React Router and Your Pokédex

- Navigating the Pokéverse: React Router and Your Pokédex App
- Setting Up React Router
- Creating Our Routes
- Navigating the Routes
- Mastering the Poké Routes: Preserving Your Pokédex Across Journeys
- Introducing the Pokédex Context
- Conclusion
Navigating the Pokéverse: React Router and Your Pokédex App
In the sprawling world of Pokémon, Trainers know the importance of a good map and a reliable Pokédex. Similarly, in the realm of web development, navigating the vast landscapes of our applications requires a robust tool. Enter React Router: the compass guiding users through your React applications with ease. Today, we embark on a journey to integrate React Router into a Pokémon-themed app, creating a seamless experience for Trainers to search for Pokémon, view their collection, and dive into detailed stats of their favorite creatures.
Setting Up React Router
Before we begin, ensure you have React Router installed in your project. If not, you can add it by running:
npm install react-router-dom
With React Router at our disposal, we can define routes that render different components based on the URL, mimicking the journey through different towns and cities in search of Pokémon.
Creating Our Routes
Our Pokédex app will feature three key destinations:
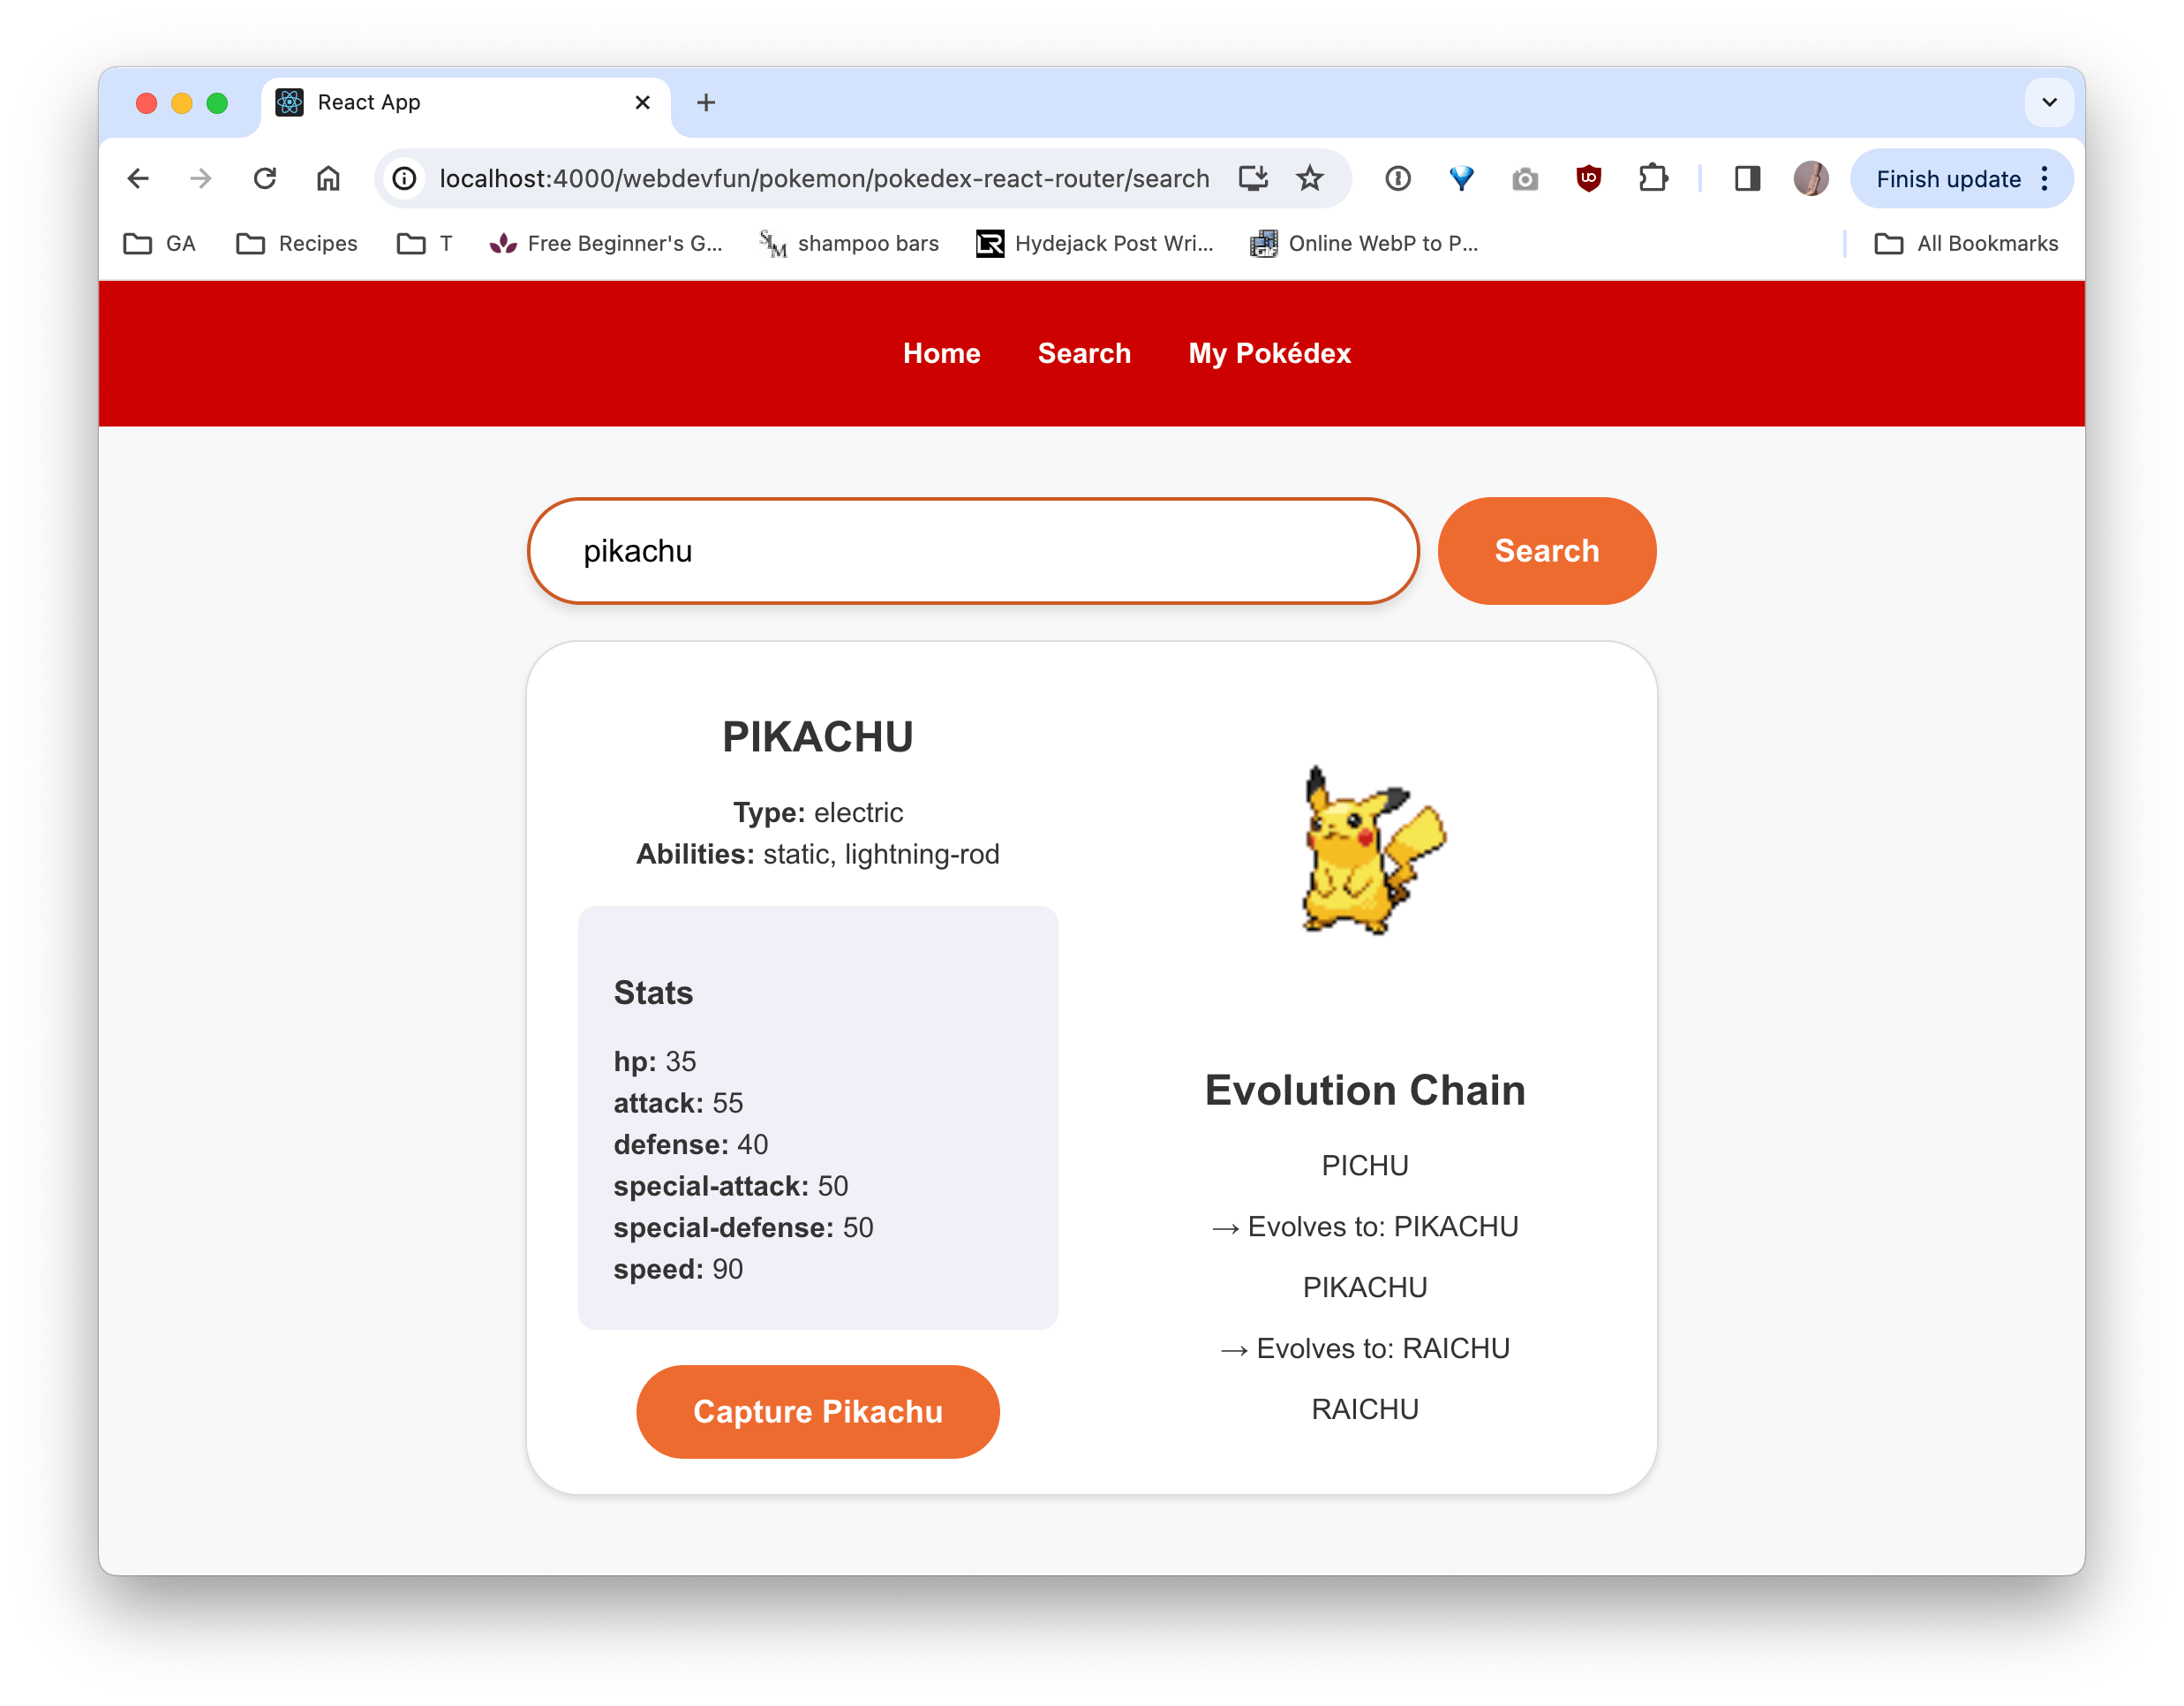
- Search Route: A place to search for new Pokémon to catch.
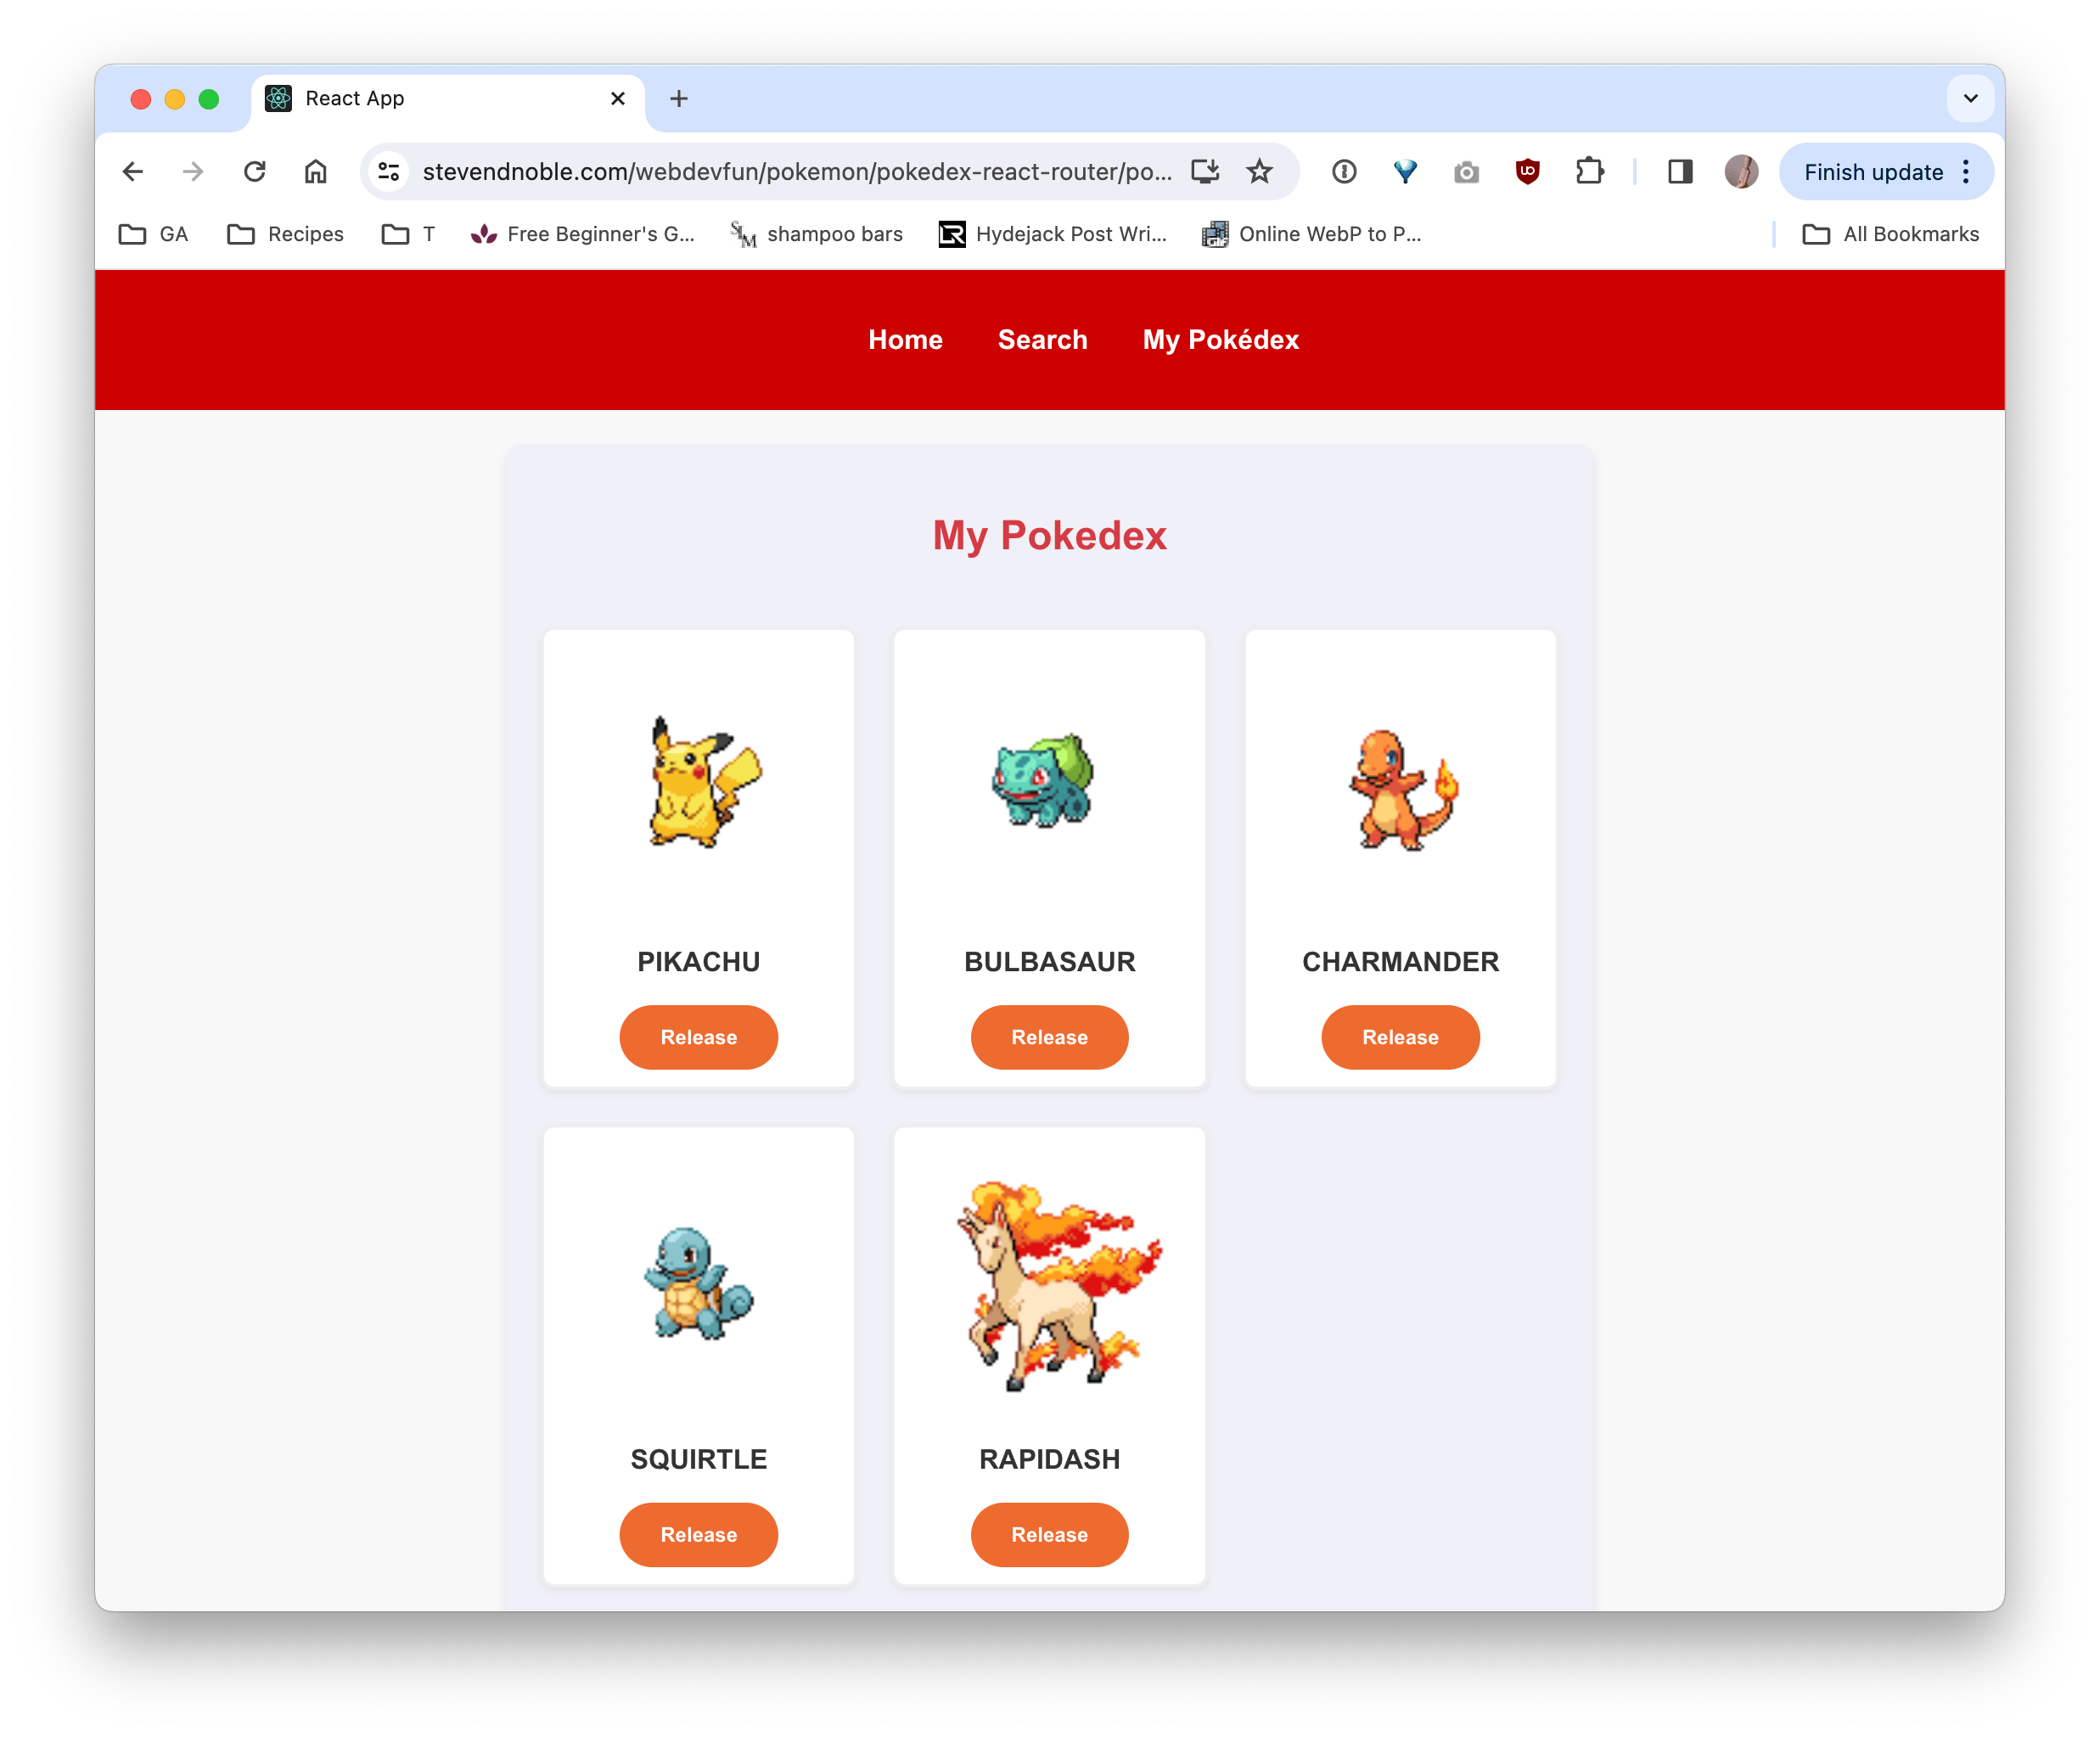
- Pokédex Route: A view of all the Pokémon you’ve captured.
- Details Route: Detailed stats and information about a specific Pokémon.
Adding the Routes in the App Component with createBrowserRouter
In App.js, we set the foundation of our Pokéverse by defining these routes using createBrowserRouter and RouteProvider components from react-router-dom. We will create separate pages for a homepage, a search page, and a Pokédex page. These components have all been created, along with an ErrorPage component and a Root component. To see the JSX and CSS modules for this, visit the pokedex-react-router repository on Github.
// file: "src/App/App.js"
import { createBrowserRouter, RouterProvider } from "react-router-dom";
import { ErrorPage } from "../ErrorPage/ErrorPage";
import { Home } from "../Home/Home";
import { Pokedex } from "../Pokedex/Pokedex";
import { Search } from "../Search/Search";
import { Root } from "../Root/Root";
import styles from "./App.module.css";

const router = createBrowserRouter(
  [
    {
      path: "/",
      element: <Root />,
      errorElement: <ErrorPage />,
      children: [
        {
          path: "/",
          element: <Home />,
          exact: true,
        },
        {
          path: "/search",
          element: <Search />,
          exact: true,
        },
        {
          path: "/pokedex",
          element: <Pokedex />,
          exact: true,
        },
      ],
    },
  ],
  {
    basename: "/webdevfun/pokemon/pokedex-react-router",
  },
);

export function App() {
  return (
    <div className={styles.App}>
      <RouterProvider router={router} />
    </div>
  );
}
Navigating the Routes
With our routes set, navigating the Pokéverse becomes as easy as clicking a link. React Router’s Link component allows us to create navigation links that don’t reload the entire page, ensuring a smooth and fast journey.
Let’s create a Navbar component to add to the Root. Then it will be visible on each of the child pages.
import { Link } from 'react-router-dom';
import styles from './Navbar.module.css';

export const Navbar = () => {
  return (
    <nav className={styles.navbar}>
      <ul className={styles.navLinks}>
        <li>
          <Link to="/home">Home</Link>
        </li>
        <li>
          <Link to="/search">Search</Link>
        </li>
        <li>
          <Link to="/pokedex">My Pokédex</Link>
        </li>
      </ul>
    </nav>
  );
};
Mastering the Poké Routes: Preserving Your Pokédex Across Journeys
Keeping state across different routes in a React application, especially when using React Router, is a common challenge that developers face. When you navigate away from a component, its state is reset. However, there are several strategies to persist state like capturedPokemon across routes:
1. Lifting State Up: One of the most common solutions is to lift the state up to a common ancestor, typically the top-level component in your application, such as
App.js. This is how we have managed the state in previous iterations of the app. By lifting state up, it is maintained outside the lifecycle of individual route components.2. Context API: For more complex state logic or deeper component trees, React’s Context API can provide a more scalable solution. You can create a context to share capturedPokemon across components without prop drilling.
3. State Management Libraries: For applications with complex state management needs, libraries like Redux or MobX offer robust solutions for managing global state. These libraries allow you to maintain state outside your component tree, making it easily accessible across routes.
4. Local Storage or Session Storage: If your goal is to persist state even after the browser is refreshed, consider using localStorage or sessionStorage. This method is particularly useful for data that doesn’t need to be real-time or refreshed often.
Choosing the Right Strategy
- Lifting state up and using the Context API are great for maintaining state across routes without persistence beyond the current session.
- State management libraries offer a robust solution for complex applications with extensive global state needs.
- Local Storage and Session Storage are useful for persisting data across browser sessions but remember to synchronize your state with your storage to keep your UI consistent.
Each method has its use cases depending on the scale of your application, the complexity of your state, and the persistence requirements.
Introducing the Pokédex Context
While React Router handles our navigation, the Context API will safeguard our Pokémon collection. By creating a Pokédex context, we establish a global state that can be accessed from any component, much like a trainer accessing their Pokédex to check on their Pokémon at any time.
For our app, we will create a PokedexProvider that takes advantage of localStorage for maintaining the state when you refresh the page. You can see the full implementation in the pokedex-react-router repository on Github. Highlighted changes are below:
// file: "src/Pokedex/PokedexProvider.js"
import { createContext, useState } from "react";

export const PokedexContext = createContext();

const useCapturedPokemen = () => {
  const [capturedPokemon, setCapturedPokemon] = useState(
    JSON.parse(localStorage.getItem("cachedPokemon")) || [],
  );

  const capture = (pokemon) => {
    if (!capturedPokemon.find((p) => p.name === pokemon.name)) {
      setCapturedPokemon((previousCapturedPokemon) => {
        const nextCapturedPokemon = [...previousCapturedPokemon, pokemon];
        localStorage.setItem(
          "cachedPokemon",
          JSON.stringify(nextCapturedPokemon),
        );
        return nextCapturedPokemon;
      });
    }
  };

  const release = (pokemon) => {
    setCapturedPokemon((prevPokemon) => {
      const nextCapturedPokemon = prevPokemon.filter(
        (p) => p.id !== pokemon.id,
      );
      localStorage.setItem(
        "cachedPokemon",
        JSON.stringify(nextCapturedPokemon),
      );
      return nextCapturedPokemon;
    });
  };

  return {
    capture,
    release,
    capturedPokemon,
  };
};

export const PokedexProvider = ({ children }) => {
  const { capture, release, capturedPokemon } = useCapturedPokemen();
  const contextValue = { capture, release, capturedPokemon };

  return (
    <PokedexContext.Provider value={contextValue}>
      {children}
    </PokedexContext.Provider>
  );
};
Accessing and Updating State Across Routes
Now, any component can access the captured Pokémon list or capture new Pokémon by using the usePokedex hook. For instance, in the PokemonDetails component, a trainer can capture a Pokémon, instantly updating the global state accessible in the Pokédex view. In the Pokedex component, a trainer can view all of their captured Pokémon and release any they want to set free.
// file: "src/PokemonDetails/PokemonDetails"
import { useContext, useMemo } from "react";
import { Button } from "../Button/Button";
import { PokedexContext, PokedexProvider } from "../Pokedex/PokedexProvider";
import { capitalizeFirstLetter } from "../../utils/stringUtils";
import styles from "./PokemonDetails.module.css";

export function PokemonDetails({ pokemon }) {
  const { capture, capturedPokemon } = useContext(PokedexContext);

  const isCaptured = useMemo(
    () => capturedPokemon.some((p) => p.id === pokemon.id),
    [pokemon, capturedPokemon],
  );

  // then, where we render the button

  {isCaptured ? (
    <p>{capitalizeFirstLetter(pokemon.name)} is in the Pokédex</p>
  ) : (
    <Button
      onClick={() => capture(pokemon)}
      disabled={isCaptured}
      className={styles.captureBtn}
      buttonText={`Capture ${capitalizeFirstLetter(pokemon.name)}`}
    />
  )}
}

export function PokemonDetailsWithProvider({ pokemon }) {
  return (
    <PokedexProvider>
      <PokemonDetails pokemon={pokemon} />
    </PokedexProvider>
  );
}

// file: "src/Pokedex/Pokedex"
import { useState, useContext, useEffect } from "react";
import { PokedexContext, PokedexProvider } from "../Pokedex/PokedexProvider";
import { Button } from "../Button/Button";
import { capitalizeFirstLetter } from "../../utils/stringUtils";
import styles from "./Pokedex.module.css";

export function Pokedex() {
  const { release, capturedPokemon } = useContext(PokedexContext);

  return (
    <div className={styles.pokedexContainer}>
      <h2>My Pokedex</h2>
      <div className={styles.pokemonList}>
        {capturedPokemon.map((pokemon) => (
          <div key={pokemon.name} className={styles.pokemonCard}>
            <img src={pokemon.sprites.front_default} alt={pokemon.name} />
            <h3>{capitalizeFirstLetter(pokemon.name)}</h3>
            <Button
              onClick={() => release(pokemon)}
              className={styles.releaseBtn}
              buttonText="Release"
              small={true}
            />
          </div>
        ))}
      </div>
    </div>
  );
}

export function PokedexWithProvider() {
  return (
    <PokedexProvider>
      <Pokedex />
    </PokedexProvider>
  );
}

Conclusion
By integrating React Router and the Context API into our Pokédex app, we’ve created a robust system that not only allows trainers (users) to navigate the vast digital Pokéverse seamlessly but also ensures their collection of Pokémon is always within reach, no matter where their journey takes them. This powerful combination of technologies empowers us to build more complex, stateful applications that are both user-friendly and highly functional, letting trainers focus on their adventure – capturing and learning about Pokémon.
